
I’m sure I’ll end up going over some of the same information included in other guides. My hope for this guide is it will consolidate useful information to improve the game-play experience for those starting out in the game.
Controls
OK, so you have just started playing, you would like to get better & there are a HEAP of different controls! What’s useful ……….. (My personal opinion)
General
- Rotate camera left / right – B / N
- Minimap – Esc (Pauses the game if playing solo, at least in campaign (Not 100% sure on skirmish))
- Center / Return to default rotation camera – Space
- Camera control – W / A / S / D
- Toggle Chat – Enter
Skills and Items, basic
- Utility skill 1 / 2 – F / V
- (Personally, I always take a movement skill on ‘V’, with ‘F’ being utility)
- Skill 1 / 2 / 3 / 4 – 1 / 2 / 3 / 4
Skills and Items, useful for high level play
- Level Down Skill 1 / 2 / 3 / 4 – Ctrl + 1 / 2 / 3 / 4
(To change round max level of skills for the situation) - Use Inventory slot 1 / 2 / 3 / 4 / 5 / 6 / 7 / 8 – Ctrl + O / A / W / S / E / D / R / F
(if you move your items into specific slots, you probably only need to remember the first 4 of these)
Player
- Move to / Interact – RMB
- Attack Target / Fire – LMB
- Select / Detonate Explosive – G / GG
Weapons
- Toggle Overwatch – E (Reserves 30 energy, lower crit chance than manual)
- Manual Aim – Left Shift (Held down)
- Toggle / Switch Weapon Selected – Q (Heavy secondaries will slow your movement if selected)
- Reload – R (If you have ammo left in the clip, it will be dropped, use sparingly)
- Toggle Weapon Mode – C (Noting that the secondary fire mode usually uses suit energy per shot)
- Drop Primary Ammo – X (Useful in co-op if squadmate has low / no ammo)
Followers
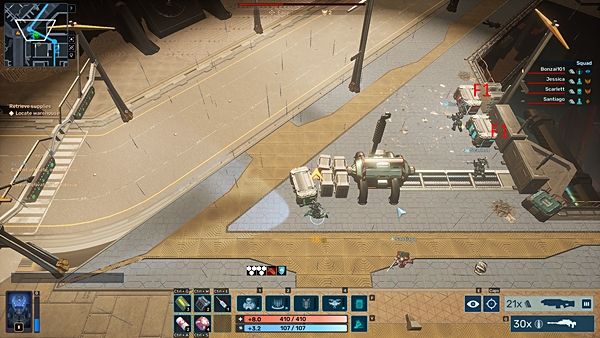
- Have follower Move / Interact command – F1
- Follow me command – F2
- Radial Menu – Left Alt
(Usually used for Rez (Right) or Fire Secondary (Top))
Minute to minute gameplay
OK, so for me personally while I’m playing, I am constantly (unless in combat) setting a point for my character to move to (overwatch on, if the situation calls for it), then moving the map away to look for crates / lockers / energy batteries / terminals / ways into buildings etc. then hitting ‘Space’ to move back to my character.
If in heavy combat, I’m focused on my character, mixing manual aim, clicking on targets to fire at specifically & skill use (If possible, holding position, as this increases energy regen compared to moving).
In campaign while moving around I target lockers etc. then use ‘F1’ constantly to have my followers do the majority of interactions (Followers are faster than you, & their looting adds to your inventory unless full.
This is much faster than just you looting & can help avoid some unhelpful behavior from your followers.
 After a recent update, your followers also teleport back to you if they are far enough away.
(Please note, a marine will not teleport back to you if you have told them to move somewhere specific, in this situation, hit ‘F2’ to have them follow / teleport to you again.)
Tac Map
 The map in TRS2 is pretty good & I find it very intuitive apart from the actual camera icon around your character.
When setting up a match, increasing the amount of artillery will put holes in walls across the map, giving Strol creatures more routes into / through buildings as well as your squad.
- You can add waypoints using LMB
- Clear these using RMB
The above is an example of how I would do waypoints in the early game, when you want to move through the different areas and loot as you go (Gathering Ammo & Items for late-game).
In the late game you would probably stick to the streets a lot more & do less looting.
 The above is an example of a bunker on the map, with two viable entrances
(the middle path has 3 blast doors in a row, 35k HP & 50 kinetic resist ea)
The northern entrance is closest to the power relay for the bunker, so is the one that you should always go for if possible.
Most classes do not excel at getting into bunkers & rely on looted explosives.
(Two notable utility skills for breaching the bunker are the Recon’s “Security Bypass” & the Demolition’s ‘Wallbreaker’)
 The above is an example of a Helipad on the map (Note : Helipads come in 3 configurations)
if one of your squadmates goes down & you do not have the opportunity (or ability) to revive them, you can use the helipad terminal to bring them back into the fight after holding position for a time.
(Note : For campaign, your followers have ‘wounds’ & can die permanently)
As you gain experience you will start seeing how buildings are re-used / rotated so will get used to the best point to breach these to get to power asap.
Loadout Overview
When creating your loadout, depending on your class, you will have a different number of slots for each of the different sections of your suit, Defense, Offense & Support.
For each of these, you will have a selection of Modules, Systems & Upgrades.
- You can have a maximum of 4 Modules (Blue, 1-4)
(having less than 4 will decrease maximum suit level & starting suit level) - You can have a maximum of 2 Systems (Green, F & V)
- The rest of your slots are filled with Upgrades (Use these to balance your power limit)
In campaign more Modules, Systems & Upgrades are unlocked through research.
In skirmish more Modules, Systems & Upgrades are unlocked through the skill tree.
This is an example of a pretty decent build
 I would consider this build good for close in security of the team, reasonably tanky & sporting some of the better abilities for the Assault.
Points of note :
- 3.96 m/s speed + a sprint ability for bursts of speed
- Field treatment for healing self & allies
- 2 active & 2 passive main abilities
- 4/s EN regen (which is fine, not too many active abilities)
This is an example of a TERRIBLE build
 I would consider this to be a terrible build, for a number of reasons.
Points of note :
- 3.22 m/s speed, you are just inviting things to eat you, as the team leaves you behind
- Having the Rocket Launcher & Minigun will be the biggest influence on the low speed
- Exceeding the power limit for the suit, leading to 2.7 EN regen (Terrible)
- The abilities in 1 & 3 work similarly to overwatch, while active they ‘reserve’ suit energy
- Due to the above, if you have both of these active, or one of them + overwatch, you will never get to use any of your other abilities.
Credit to: Bonzai101